Thursday, March 31, 2011

Let's do the Twist!

Late last year, I did something CRAZY!  It was unexpected.  It was not something I had planned to do.  It just came to me in an instant while shopping in one of those large warehouse stores.  It has forever changed the way we do some things around here.

I. gave. up. paper. towels. 

I know.  What was I thinking?  I have two small children who are masters at mess making.  They can spill anything on a clean countertop within seconds of it being cleaned.  They build enormous crumb piles out of very little food.  They can make confetti out of crayons.  Don't even get me started on Play-Doh (which has been outlawed) or Goo or anything that comes out of a pre-packaged science set.  Without paper towels, all of these things present new challenges.  And, yet, I have given them up.  Oy.

UNTIL NOW.

Now, I do the Twist:
And, best of all, a set of three is on SALE at Fresh Market right now for $2.99.  Run, people, don't walk.  Run.

Wednesday, March 30, 2011

The FULL File: Bon Voyage, Baby Vidalia Onions!

Last week, my husband made a trip north to take care of his Mom.  She is recovering from surgery to repair a broken femur- the result of a skiing accident.  Not good.  I mean the broken femur, not the visit.  The visit was very good.  At any rate, I wanted to send my husband off with a full belly.  The way to a man's heart and all that.  Well, my man happens to have a thing for onions.  And, I just happen to have onions, sweet onions, in the garden just begging to be used.  I guess that makes us a match made in heaven the garden.
All I needed was a great recipe that would highlight the onions.  Enter, Quick-fix Southern: Homemade Hospitality in 30 Minutes or Less, and the Baby Vidalia Frittata.  Wouldn't you know it!  The onions growing in that photo just happen to be Yellow Granex Onions.  If the folks at Botanical Interests are to be believed, then this type of onion is approved by the Georgia Agricultural Commission for use by farmers growing the famous Vidalia Onions.  I planted some seeds last fall and had been waiting for them to be big, plump bulbs so I could yank them out of the earth and do something fun with them.  But, according to Rebecca Lang, the cookbook author, there was no reason to keep waiting.  She says, "Once I see the baby onions in the store, I use them in every recipe I can...  ...the onions are tender and delightful."  That was all the convincing I needed to commence yanking.  The fact that my husband also loves sharp Cheddar cheese was an added bonus.  And there you have it.  That is how the frittata and cornbread became my husband's bon voyage meal.

Fresh-picked onions and parsley

Baby Vidalia Frittata
Serves 6
2 tablespoons olive oil
4 baby Vidalia onions, thinly sliced (white and green parts)
8 large eggs, beaten
1/4 teaspoon salt
1/4 teaspoon freshly ground black pepper
1 cup pre-shredded sharp Cheddar cheese
Fresh flat-leaf parsley, chopped


  • Move the oven rack to a position about 5 inches from the broiler. Heat the broiler.
  • Heat the olive oil in an ovenproof, nonstick 10-inch skillet over medium heat. I used my trusty cast iron skillet.  Add the sliced onions and cook, stirring often, for 6 minutes or until soft. Arrange the onions evenly over the bottom of the skillet.
  • Combine the eggs, salt and pepper in a medium bowl. Pour over the onions. Cook, uncovered, over low heat for 9 minutes.  The center of the frittata will still be wet.
  • Sprinkle the cheese over the top of the frittata and broil until the cheese is melted and the eggs are cooked, about 1 minute.
  • Sprinkle with the parsley before serving.
Note:  While this recipe says it serves 6, it does not.  My husband and I each ate a healthy portion.  So, we'll just say this serves 3-4 for dinner-sized portions.  When I make this again, I will add additional fresh veggies like asparagus, broccoli, peppers, etc. 
The onions, ready to get cookin'!

Chopped onions and eggs.

Sauteing the onions in olive oil.

Eggs have just been added.

Next up, broiler.

Out of the broiler and ready to be dressed.

All done.  Let's eat!

Delicious!
For anybody who is interested in this cookbook or Rebecca Lang, you can see her demonstrate a few of her recipes at Whole Foods, Johns Creek, on April 26th.  It costs $49 and includes a copy of her cookbook.

Here's a bit more info:
  
Quick Fix Southern: Homemade Hospitality in 30 Minutes or Less
Tuesday, April 26th

6:30 to 8:30pm $49 Demonstration

Y’all come and get it! Tonight’s class features recipes from Rebecca’s new cookbook, Quick-Fix Southern: Homemade Hospitality in 30 Minutes or Less. Mouthwatering meals can be prepared in a jiffy, thanks to Rebecca Lang’s tasty recipes that defy the notion that Southern cooking is a time-consuming endeavor. In addition to being quick without sacrificing flavor, each recipe is inviting, simple to make, and user-friendly – even for novice chefs. Rebecca, a popular cooking instructor, sprinkles in expert cooking tips and tidbits of Southern history, providing added spice to this evening’s class. Students will also be invited to join in and make “Rebecca’s Quick Icebox Pickles” to take home. A copy of Rebecca’s new cookbook is included in the price of the class.  MENU: Pickled Okra & Ham Wheels; Ribeyes with Bourbon Pecan Butter; Asparagus Bundles with Bacon; and Lazy Girl Berry Cobbler.

You can register for this event by clicking -->here<--.

Monday, March 28, 2011

GREAT Events: Container Gardening and Home Depot/GiGi's Cupcakes/Master Gardeners Events

Two great gardening events coming up this weekend in the area:

Urban Gardening Program Presents: Vegetable Gardening in Small Spaces


There is no need to have a yard or farm to grow your own veggies.  Grab a container and soil, and start growing!  Learn everything you need to know about growing and harvesting your own food on a patio or back porch.  View the PDF of the event -->here<--.

Speaker: Sarah Brodd, Program Educator, UGA Cooperative Extension in Dekalb County
When: Saturday, April 2nd @ 11 AM
Where:  Brookhaven Library, 1242 N. Druid Hills Road, Atlanta, GA 30319
Contact: Brookhaven Library, 404-848-7140

Home Depot and GiGi's Cupcakes teams up with Fulton County Master Gardeners

Stop by your local Home Depot this Saturday and ask Master Gardeners your gardening and landscape questions.  This is a free event sponsored by GiGi's Cupcakes.  Yum!

When: Saturday, April 2nd, 10 AM - 2 PM
Where: Home Depot, 6400 Peachtree-Dunwoody Road, Atlanta, GA 30328 (next to Costco)
Contact: Cyndee Lucia, Home Depot, Horticulturist, 770-804-8065

Tuesday, March 22, 2011

The FULL File: What to do with garden fresh asparagus and broccoli

It's dinner time.
The end of the broccoli is here and the asparagus is just starting to come into play.
So, what can you possibly do with only a hand full of broccoli and a measly 5 asparagus spears?

Pesto dressed Whole Wheat Pasta topped with Asparagus and Broccoli drizzled with Roasted Garlic Oil
Serves 2
(you do not need exact measurements for this meal.  It is completely by taste.  You can add more or less of each ingredient and it will still be delicious. And, because we have high cholesterol and high blood pressure in our household, I don't add salt.  But, you certainly can.  I should warn you that I am not a talented cook, but even I can make this.  So, I am sure you can and you can probably make it better!  Although, nothing tastes quite like homegrown vegetables.  My husband took one bite of the asparagus last night and said, "Wow!  Oh my Gosh!  This- is- so- good!")

1 cup broccoli, cut any way you like
4-5 asparagus spears, tough ends snapped off and washed, cut into 1 inch pieces
2-3 cups cooked and drained whole wheat pasta
2-4 Tbsp freshly grated Parmesan cheese
2-4 Tbsp pesto
2 Tbsp roasted garlic oil (any will do, I use Lizzie's)

This comes together so easily:
  1. Boil the whole wheat pasta, any type, according to the manufacturer's directions.
  2. Drain the pasta and toss with the pesto using more or less depending on your taste.
  3. Meanwhile, steam the broccoli for 3-4 minutes.
  4. Add the asparagus to the broccoli and steam for another 2 minutes.
  5. Toss the steamed broccoli and asparagus with the roasted garlic oil to taste.
  6. Place about 1 cup of dressed pasta on each plate and top with the broccoli and asparagus mix.
  7. Top with the fresh shredded Parmesan cheese.
And, that's it!  Dinner is served!  Now, I should mention that this serves 2.  My kids don't like this and so I made this for the grown-ups and the kids got red sauce with turkey meatballs from the freezer.  Maybe someday?  I don't know.  One can only hope...

PS - At the end of the growing season, I make my own pesto and freeze it for later use.  I have used it all winter and it tastes just like summer to me.  I like Ina's recipe the best, but I like my pesto with less oil and a hint of lemon.  Here's her recipe:  Ina's Delicious Pesto.  Instead of using 1 1/2 cups of oil per batch, I use half or 3/4 cup of good extra virgin olive oil.  And, I add a squeeze of lemon juice per batch.  If you are not into making your own, then I highly recommend LeGrand 4 Nuts and Cheese Pesto.  It is delicious.

Monday, March 21, 2011

NewBee: Equipment ordered without a moment to spare

Well, I did it. 
I have ordered my beekeeping equipment. 

I have agonized over this for days, weeks, MONTHS.  As you may recall from my prior post, it was not the idea of keeping bees that terrified me, it was the equipment.  I finally got a handle on the equipment.  Or, so I thought.  Then, came the hot issue in backyard beekeeping right now:  standardized components or non-standardized components.  What this essentially means is do you buy all the same sized boxes or do you buy a combination of different sized boxes?  Oh, and then the issue of choosing 8-frame or 10-frame components.  For every person who says to buy standardized components, there is another person who says to buy assorted sizes.  Same goes for the 8 vs. 10 frame issue.  Not knowing for sure what to do, I decided to standardize with one exception, I will try one deep hive body to see how it goes.  So, in the end, I went with 8-frame components, mostly medium sized with one deep hive body.  I think the smaller, lighter boxes will enable the kids to get more involved in the hives.

Here's what my final list looked like:
(I ordered all my components and equipment from Brushy Mountain except for the kids' suits.  Those are being made by BeeWorks.  They are so cute!  Image HERE.  Also, I had already ordered my veil and our gloves and the smoker.)

  DESCRIPTION                                         QTY    TOTAL
------------------------------
---------------------------------------------
  8-Frame Ventilated Inner Cover & Moving    2      $19.00

---------------------------------------------------------------------------
  8 Frame Telescoping Top                              1      $17.95

---------------------------------------------------------------------------
  8 Frame IPM Bottom Board                          1      $14.95

---------------------------------------------------------------------------
  8--Frame Entrance Reducer                           1      $0.95

---------------------------------------------------------------------------
  Commercial 8-Frame Unassembled Medium S10     $115.00

---------------------------------------------------------------------------
  Brushy Mtn.10'' Hive Tool                              2      $13.00

---------------------------------------------------------------------------
  Frame Perch                                                   1      $21.95

---------------------------------------------------------------------------
  Frame Grip                                                     1      $17.95

---------------------------------------------------------------------------
  Bee Brush                                                       3      $14.85

---------------------------------------------------------------------------
 5 lb Box 5-5/8 Cutcomb Foundation               1      $34.95

---------------------------------------------------------------------------
 Frame Assembly Jig                                        1      $32.95

---------------------------------------------------------------------------
 6-1/4 Frame Wedge Top/Grooved Bottom (e80     $68.00

---------------------------------------------------------------------------
8-Frame Unassembled Hive                              1      $57.95

---------------------------------------------------------------------------
1 lb.1-1/4 Nails                                                 1      $2.95

---------------------------------------------------------------------------
1 lb.7-D Nails                                                   3      $8.25

---------------------------------------------------------------------------


So, there you have it.  Everything I need to get started on the two hives.  Well, except the bees.  Those are coming from two local bee/queen suppliers.  And, I ordered extra hive brushes and tools so the kids can have one to use without having to worry about handing it back and forth, it getting dropped, etc.  I am really getting excited.  But, also nervous.  I have not left myself much time to get all this equipment built and ready before the bees are to arrive.  Ugh.  Why do I do this to myself?  Off to Home Depot to see if they have any remnant paint.

Saturday, March 19, 2011

Happy Georgia Master Gardener Day!

In honor of Georgia Master Gardener Day, here is the 2011 edition of the Spring Garden Packet, a series of links with gardening tips for the upcoming growing season:
 -->click here for the good stuff!<--
Image credit: Stephanie Schupska/UGA

Thursday, March 17, 2011

Turf Wars

Well, it is nearly Thursday.  I am writing this much later in the week than I thought I would be.  Part of it is because my schedule has been crazy.  The other part is that it has taken my hands and arms this long to stop vibrating from the rear-tined tiller.  If you think my typing is bad under normal conditions...

Earlier this month, I mentioned that my husband and I had decided to wage war against our existing turf.  I posted pictures 
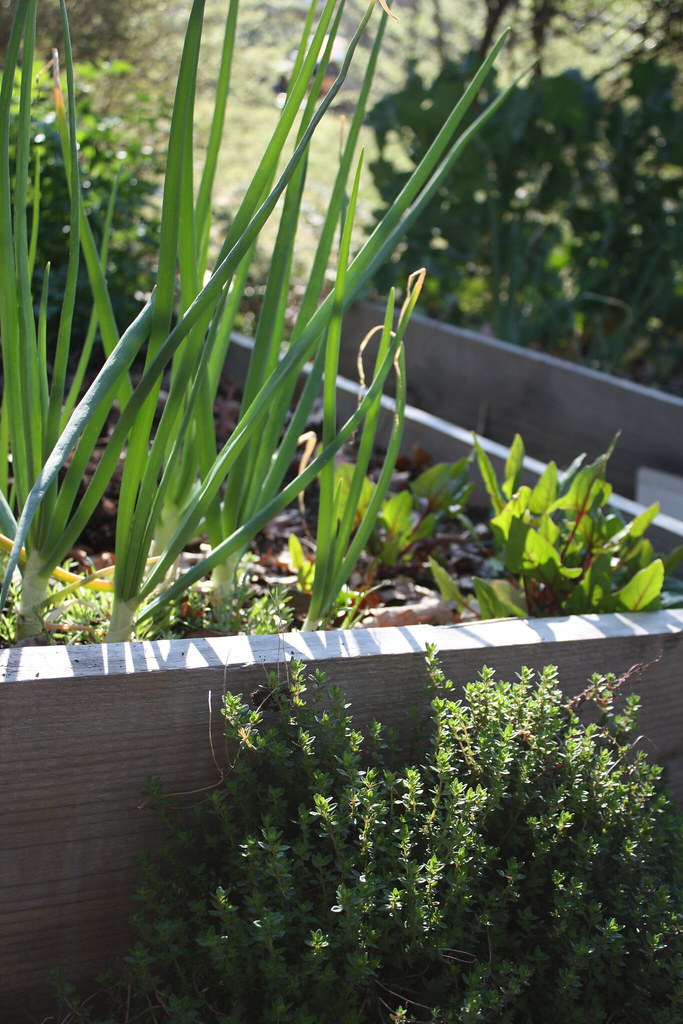
here.  Let me help you understand the severity of the situation.  Fescue.  Full sun.  All day.  Sun up to sun down.  No exaggeration.  Again, fescue.  In last summer's heat.  With a record number of 90 degree days.  And, record nighttime temperatures.  A very lazy and inattentive (at least inattentive to the turf) homeowner/gardener.  (In my own defense, I had my reasons.)  A water bill that was getting crazy.  And so, sometime around August, we waved the white flag.  Complete surrender.  We admitted defeat and decided we would start over by re-sodding in the spring with a more drought and heat tolerant grass.  Enter, JaMur Zoysia.

Now, if you think sodding might be in your future, then you are bound to do some research on the type of turf grass that you want to put down.  That's step one.  There are many sources of information on the Internet, but how can you be sure they are trustworthy?  This site, is an excellent place to start.  It's a website, hosted by UGA, that provides turf selection information as well as retailers for GCIA Blue Tag certified sod and seed.  What is GCIA and why is it important?  The Georgia Crop Improvement Association regulates genetic purity for all Blue Tag certified turf products in the state.  What does a Blue Tag certified turf product get you?  Well, you will get turf that has been grown under very strict rules and regulations to ensure your new turf will be free of noxious weeds, common bermuda and any other contaminating turf grass.  Folks, if you are going to spend the money, time and energy, this is what you want.  And, the good news, the price is reasonable and many of the growers will do residential deliveries of turf for a minimal charge.  We got ours delivered for $75.  And, no middle man.

Now, you have decided what kind of sod you want and you have decided to put it down yourself.  Next step, Patten Seed has an excellent video that will give you the basic steps.  --> click here!<--

Basically, here's how it goes down:
  1. You want to remove any current growth.  Many use Roundup for this.  We were lucky, Mother Nature took care of this for us the summer before.  In reality, "they" say you should remove all growth, but we didn't.  We just tilled in the flourishing weeds really well.  We hope that will be good enough.  Some people don't even do this step.  This brings us to the next step...
  2. You will want to use a rear-tine tiller to till up the existing soil.  This is not difficult, but it does take some time.  Again, some people don't do this step either.  Moving on...
  3. If you have any drainage issues or areas that need to be re-graded, you want to do that next.  We had this problem.  So, we ordered 12 cubic yards of good soil from Atlanta Landscape Materials and played in dirt for what felt like years but was, in reality, less than a day.  This was the high drama portion of the project complete with I-can't-lift-one-more-shovelful-of-dirt-or-rake-one-more-area-not-quite-tears-but-very-close moments.  And, you guessed it, some people don't do this step...
  4. Now, you use a sod roller over your dirt to ensure everything is level and graded nicely and you turn on the sprinklers.  Be very careful here.  If it is anywhere near 70 degrees, children will seem to appear out of thin air and beg to run and play in them.  The thing is, you have just hauled around a truck's worth of dirt and you will be tempted to run in it yourself.  But, don't!  Remember, you just graded and smoothed your dirt!  Assuming it all looks good, you get to...
  5. Lay the sod that has been sitting there all tidy on pallets, patiently, just waiting to get in on the action!  The goal here is that you don't want the seams to match up.  You want to lay it down like a bricklayer would.  When you have placed that last piece of sod, you get to...
  6. Roll it with a sod roller.  And, then you get two drinks, one for the sod and one for you.  Done.
Now, what you have just read is the "proper" way to sod.  My parents have their own way.  It goes like this:
  1. Dad accepts the delivery of sod.  He and Mom walk out to the existing untilled, untouched landscape and lay it down.  Dad allows his aging mother visiting from Florida to help them because it is so easy.  They finish in under a day and it looks amazing to this day.  Many years later, when daughter says she and her husband have just tilled, graded, smoothed, sprinkled, sodded, rolled and sprinkled again 4000 square feet of land, parents laugh and ask what the hell they did all that "extra stuff" for.  Done.
Interestingly, the drivers who delivered our sod also applied my parents' technique with great success.  In fact, they outright asked me why we bothered to till.  They laid their sod right on top of bermuda they no longer liked and had great success.  I am glad my husband was out of earshot for this.  Following the proper method was mostly my idea which he bought into.  I can be very persuasive.  When it counts, I tend to be an instruction reader/follower.  I say all this because while it was too late to save ourselves, it may not be too late for you.  That said, apply this technique at your own risk.

Photos of our battle can be found on flickr:
http://www.flickr.com/photos/60702413@N07/sets/72157626283541822/

The end.

Wednesday, March 16, 2011

In the Garden: Hello, Asparagus!

I almost missed it digging through the bed.  In fact, I found it by nicking it with my fingernail.  Oops!  I can't wait for fresh roasted asparagus... 

Thursday, March 10, 2011

Beekeeping boots even Diddy would love

I am in the midst of finalizing our bee gear for the upcoming season.  When I say gear, I mean clothing.  And, I know that it doesn't make sense to want to look decent (forget fashionable) while keeping bees, especially since I am fairly certain that running from an angry hive while screaming like a maniac and swatting at anything anywhere near me is an image that can't be beautified no matter what I am wearing.  That image is way too much comedy to be saved.  (Even though I swear I won't do that.  Really.  I won't do that.  I WILL NOT do that.  I really hope I don't do that...)  

Still, I find myself looking at the all-white bee suits and ridiculously asking myself, "Will that flatter at all?"  I know what you are thinking.  I KNOW.  It is as if the gravity of what I have signed up for hasn't quite sunk in just yet.  Maybe it hasn't.  I am too busy focusing on these:

Onguard White PVC Boots 16" Over-the-sock Plain Toe

I am just thinking white skinny jeans would be so cute tucked into these!  And skinny jeans under one of those white beekeeping jackets with a veil?  Maybe beekeeping gear can be practical with a nod toward fashion, after all?  (Think Hunter boots, skinny jeans and a denim coat -it's all very J.Crew.)  In my beekeeping case, I can go straight from the hive to P.Diddy's annual "White Party!"

If you have read all the way to here and you are still reading, well let me just say...
  1. You are a very tolerant person.
  2. You need to know that I know that I don't need these; that I understand that sneakers would do the job.  But, I happen to have a thing for gadgets and these qualify as gadgetry in my book.
  3. If you are, by any chance, a beekeeper and are rolling your eyes because of all the reasons why this entire post is ridiculous, well, I would like you to know that I realize this is silly, but some things should be fun.  What can I say?  I'm a fun-loving, nature gal.

EVENT: City of Dunwoody Sustainability Commission Rain Barrel Workshop

Would you consider spending $35 if it meant you could water your prized plantings for FREE this growing season? 

Do you strive to maintain healthy bacteria in the soil where you are growing edibles?  

Aware that chlorine in our house/hose water kills the healthy microbes living in the soil and leaves the garden more susceptible to pests and diseases, are you looking for a better way to water?

If you answered "yes" then here's an event for you:

City of Dunwoody Sustainability Commission Rain Barrel Workshop
A Class Hosted by the Upper Chattahoochee RiverKeepers on Rainwater Reuse

The City of Dunwoody Sustainability Commission would like to invite interested parties in becoming a part of the water crisis solution by participating in a rain barrel class hosted by the Upper Chattahoochee Riverkeepers.  The Commission is holding a class to educate the community on the importance of water conservation and the effects of stormwater runoff while still enjoying the benefits of maintaining a beautiful landscape. Participants will receive a 60 gallon rain barrel donated by Coca-Cola, hose spigot, overflow valve, down-spout attachment and filter screen. Staff and Commission will assist in the assembly.
Reservations are required, so please call Rebecca Keefer at 678-382-6811 or email Rebecca.keefer@dunwoodyga.gov.  The cost is $35 per person.  Space is limited to 25 people per class, so be sure to reserve your space.  Please drive a vehicle that can carry your 60 gallon rain barrel home!


WHAT:               Rain Barrel Workshop

WHO:                 The event is open to the public by reservation only.

WHEN &            Tuesday, April 19, 2011
WHERE:             Begins at 6:00 p.m.
                           City of Dunwoody
                           Mayor and Council Chambers
                           41 Perimeter Center East
                           Dunwoody, GA                          


Monday, March 7, 2011

Landscaping Throwdown: Turf

The Defender
The Challenger
The excitement begins this weekend.  
(And, yes, that is an actual photograph of our pitiful front lawn.) 

Sunday, March 6, 2011

There she grows again: The Great Pumpkin Experiment

For me, gardening is basically one experiment after another. Some are successful and some are, well, they don't end in an "oh, wow- I can't believe that worked" moment.

Anyway, last fall, I did an experiment with pumpkins where you put pumpkins, seeds and all, outside and have them wait until spring to send up volunteers. This is something I had read about on the Internet and decided to try thanks to the lovely owner of Indigo Bath & Body, who completely inspired me with the following, which she posted to her Facebook page:
Last year we held our green wedding at our dearest friend and maid of honor's farm, Blossom Hill. As part of the decorations, we used a plethora of pumpkins. After the wedding was finished and guests toted home all the pumpkins they could carry, farmer Melissa took what pumpkins remained and saved them for us for next season. Once spring came, sprouts of pumpkin vines started poking their heads through the grasses in the field. Now we've come full circle, and harvest time is here. This is the last crop ever to be grown by Blossom Hill, and they'll be be harvested and used in our Harvest Pumpkin soap.
(It sounds so romantic, doesn't it? Now, I should warn you that if you absolutely must have pumpkins for fall, I do not recommend this method. I would go with more traditional methods. The jury is still out on my untested, accidental-at-best method.)

Inspired, here's what went down:
  • We carved our pumpkins. And, as usual, that was fun. Normally, we'd roast and eat the seeds. This year, we just dumped all the seeds into a large, white bucket. That's it. No rinsing. No separating. Just dumping. And, then they lived on the back deck for a spell.
  • Shortly after Halloween, I retrieved the carved pumpkins from the front steps. Now, to be totally honest, I have no idea how much time went by. I know it was longer than I had intended, but before Thanksgiving. Long enough that it had rained and I wondered what that would do to the seeds since they were now floating in the bucket.
  • I took those pumpkins and placed them on what I like to think of as the slippery slope of the backyard. I call it this because it is sloped and nothing really grows there except some daylilies. But, it gets a decent amount of sun and could be useful if I gave it some attention. Also, it is a not-so-subtle reminder of what the entire yard could look like if I don't give it the attention it needs. This alone scares me right into action.
  • I filled the pumpkins with seeds from the white bucket. Let me just say that I recommend rubber gloves for this. It was not entirely unpleasant, but it was not pleasant, either. I don't think the aforementioned rain helped.
  • Then, because there was a lot of extra space remaining in the pumpkins after I added the seeds, I decided to cover the seeds inside the pumpkins with peat and sort-of mixed it around feeling very witch-y all the while. My very scientific explanation for why I did this- it just seemed like they would be more stable on the hill if they were sufficiently filled in and weighed down. And, because I had peat in the garage, I used that. This is really ridiculous when I think about it now because peat weighs next to nothing. But, whatever, it's what I did.
  • Then, I walked away, braced myself for winter and prayed for an early spring.
This morning, I went out to the yard to do a quick assessment. I decided to check out the slippery slope. And, in an area that was once a pumpkin, seed and peat pile I found this:
Could it possibly be a pumpkin seedling?
It looks similar, but it can't possibly be one, can it?
In March?
Only time will tell...